Advanced Slurm jobs
The following page describes how to use the srun command to run
simple commands on the cluster, how to queue batches of jobs using
sbatch, including how to manage these jobs and how to map
Controlling environment variables
By default, your sbatch script and srun command will inherit
environment variables set before you run sbatch/srun. This means
that, among other things, modules loaded prior to running your job will
remain loaded once your job starts running.
However, if you are running tools that are affected by environment
variables, this may result in your script acting differently depending
on in what context you run it, and making it hard to reproduce your
analyses. To mitigate this, it is possible to control what environment
variables are inherited via the --export option for
sbatch/srun.
The recommended usage is --export=TMPDIR, which only inherits the
TMPDIR variable from your terminal. The motivation for doing so is
that we've configured it to point to the /scratch folder, ensuring
that there is plenty capacity for whatever temporary files your programs
might generate:
1#!/bin/bash
2#SBATCH --export=TMPDIR
3
4module purge
5module load samtools/1.20
6samtools --version
Run module purge first is recommended, even when using --export,
as sbatch will execute your bash startup scripts and those may also load
modules automatically.
Running commands using srun
The srun command can be used to queue and execute simple commands on
the nodes, and for most part it should feel no different from running a
command without Slurm. Simply prefix your command with srun and the
queuing system takes care of running it on the first available node:
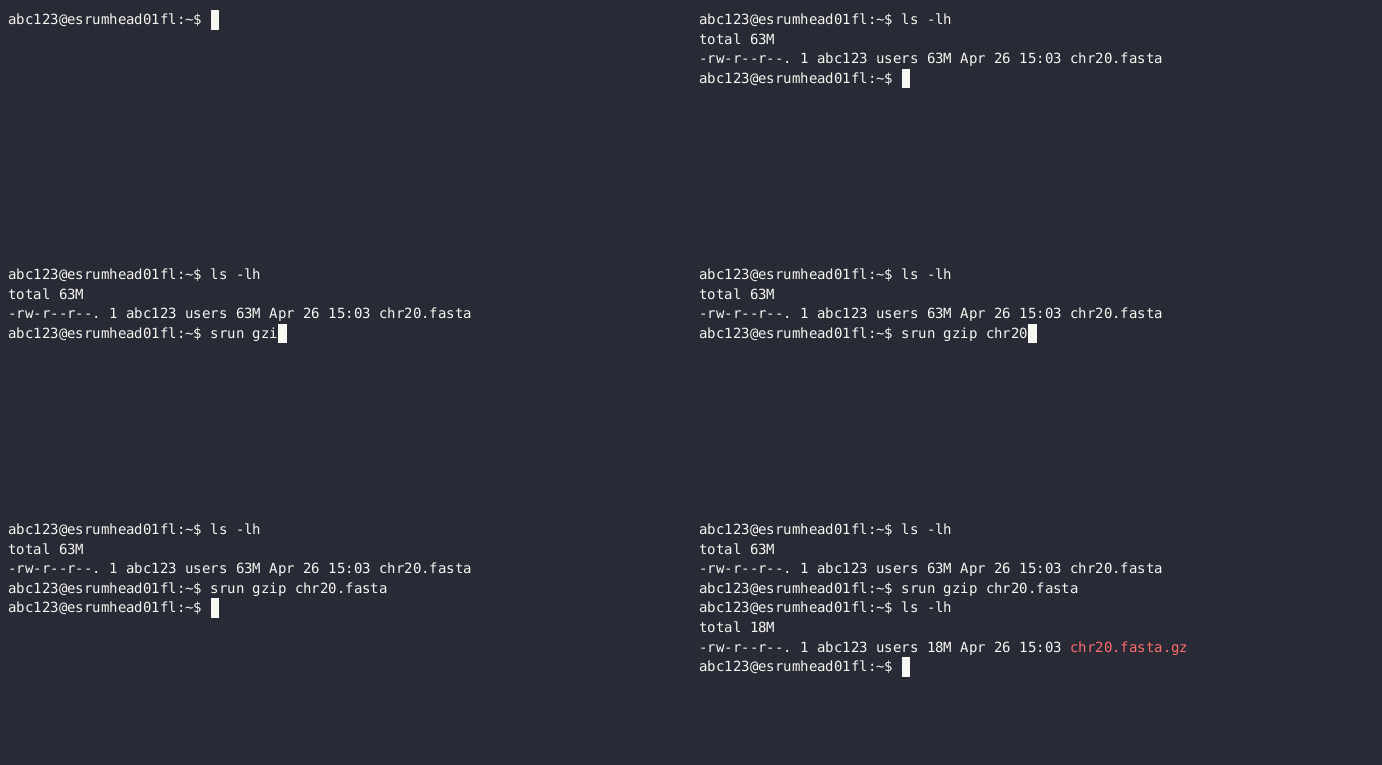
$ srun gzip chr20.fasta

Except for the srun prefix, this is exactly as if you ran the
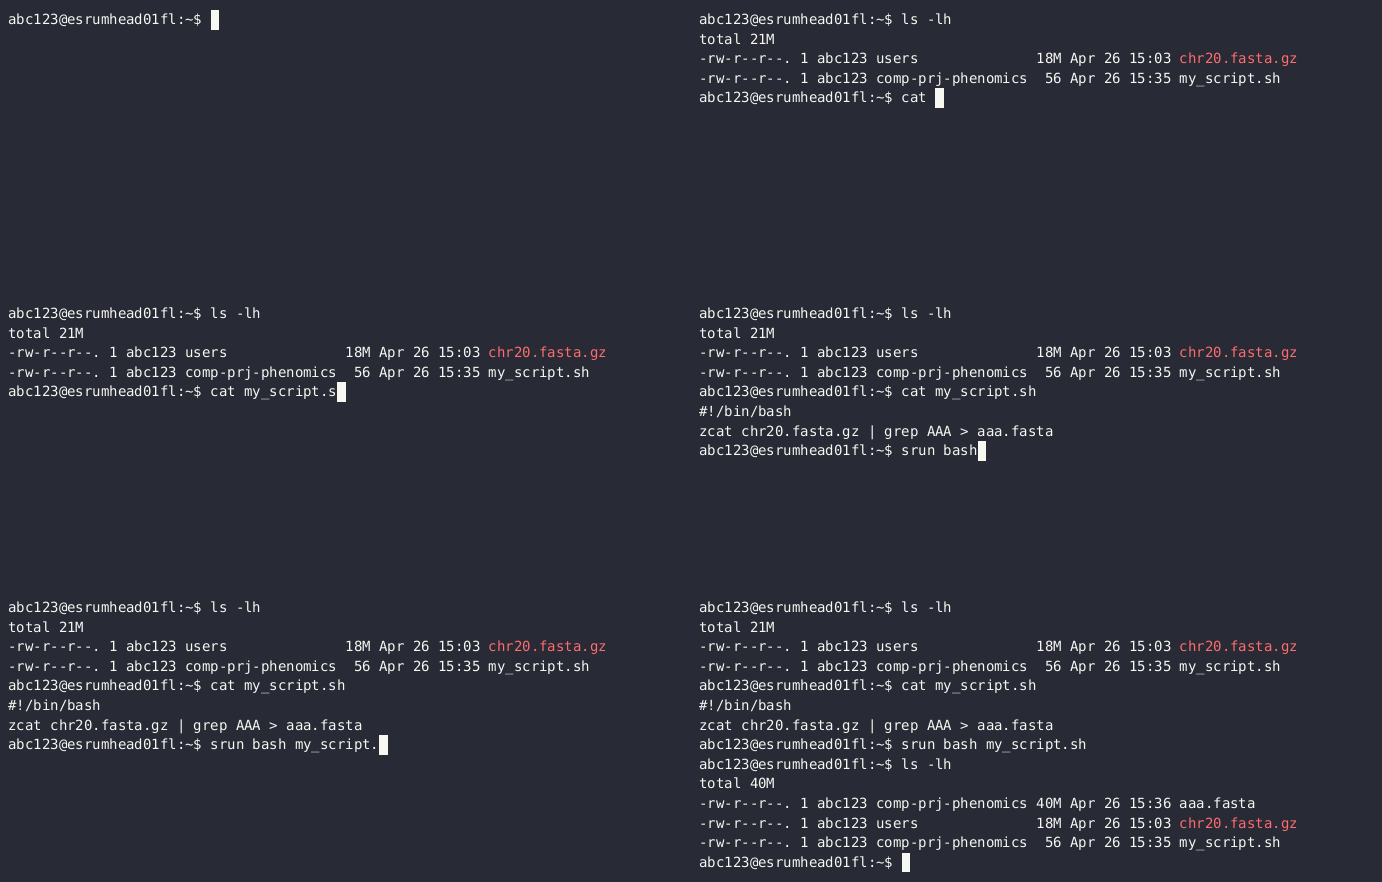
gzip command on the head node. However, if you need to pipe output
to a file or to another command, then you must wrap your commands in a
bash (or similar) script:
$ srun bash my_script.sh

But at that point you might as well use sbatch with the --wait
option if simply you want to be able to wait for your script to finish.
Cancelling srun
To cancel a job running with srun, simply press Ctrl + c twice within 1 second:
$ srun gzip chr20.fasta
<ctrl+c> srun: interrupt (one more within 1 sec to abort)
srun: StepId=8717.0 task 0: running
<ctrl+c> srun: sending Ctrl-C to StepId=8717.0
srun: Job step aborted: Waiting up to 32 seconds for job step to finish.
See also the Cancelling jobs section on the Basic Slurm jobs page.
Running multiple tasks using arrays
As suggested by the name, the sbatch command is able to run jobs in
batches. This is accomplished using "job arrays", which allows you to
automatically queue and run the same command on multiple inputs.
For example, we could expand on the example above to gzip multiple
chromosomes using a job array. To do so, we first need to update the
script to make use of the SLURM_ARRAY_TASK_ID variable, which
specifies the numerical ID of a task:
1#!/bin/bash
2#SBATCH --cpus-per-task=8
3#SBATCH --time=60
4#SBATCH --array=1-5%3
5
6module load igzip/2.30.0
7igzip --threads ${SLURM_CPUS_PER_TASK} "chr${SLURM_ARRAY_TASK_ID}.fasta"
The --array=1-5%3 option specifies that we want to run 5 tasks,
numbered 1 to 5, each of which is assigned 8 CPUs and each of which is
given 60 minutes to run. The %3 furthermore tells Slurm that at most
3 tasks can be run simultaneously (see below).
The above simply uses a contiguous range of job IDs, but it is also
possible to specify a combination individual values (--array=1,2,3),
ranges (--array=1-10,20-30), and more. See the sbatch manual
page for a description of ways in which to specify lists or ranges of
task IDs.
Note
Values used with --array must be in the range 0 to 1000.
Our script can then be run as before:
$ ls
chr1.fasta chr2.fasta chr3.fasta chr4.fasta chr5.fasta my_script.sh
$ sbatch my_script.sh
Submitted batch job 8504
$ squeue --me
 JOBID PARTITION     NAME     USER ST       TIME  NODES NODELIST(REASON)
8504_1 standardq my_scrip   abc123  R       0:02      1 esrumcmpn01fl
8504_2 standardq my_scrip   abc123  R       0:02      1 esrumcmpn01fl
8504_3 standardq my_scrip   abc123  R       0:02      1 esrumcmpn01fl
8504_4 standardq my_scrip   abc123  R       0:02      1 esrumcmpn01fl
8504_5 standardq my_scrip   abc123  R       0:02      1 esrumcmpn01fl
$ ls
chr1.fasta.gz  chr4.fasta.gz  slurm-8507_1.out  slurm-8507_4.out
chr2.fasta.gz  chr5.fasta.gz  slurm-8507_2.out  slurm-8507_5.out
chr3.fasta.gz  my_script.sh   slurm-8507_3.out
Unlike a normal sbatch command, where Slurm creates a single
.out file, an sbatch --array command will create a .out file
is for each task in the array.
In this example there was a simple one-to-one mapping between the
SLURM_ARRAY_TASK_ID and our data, but that is not always the case.
The Mapping task IDs to data section below describes several ways you
might use to map the SLURM_ARRAY_TASK_ID variable to more complex
data/filenames.
Limiting simultaneous jobs
By default, Slurm will attempt to run every job in an array at the same time, provided that there are resources available. Since Esrum is a shared resource we ask that you consider how much of the cluster you'll be using and limit the number of simultaneous jobs to a reasonable number.
Limiting the number of simultaneous jobs is done by appending a %
and a number at the end of the --array value as shown above. For
example, in the following script we queue a job array containing 100
jobs, each requesting 8 CPUs. However, the %16 appended to the
--array ensures that at most 16 of these jobs are running at the
same time:
1#!/bin/bash
2#SBATCH --cpus-per-task=8
3#SBATCH --array=1-100%16
This ensures that we use no more than 1 compute node's worth of CPUs (128 CPUs per node) and thereby leave plenty of capacity available for other users.
In addition to limiting the number of simultaneously running jobs, you
can also give your jobs a lower priority using the --nice option:
1#SBATCH --nice
This ensures that other users' jobs, if any, will be run before jobs in
your array and thereby prevent your job array from always using the
maximum number of resources possible. Combined with a reasonable %
limit this allows you to run more jobs simultaneously, than if you just
used a % limit, without negatively impacting other users.
Please reach out if you are in doubt about how many jobs you can run at the same time.
Managing job arrays
Job arrays can either be cancelled as a whole or in part. To cancel the entire job (all tasks in the array) simply use the primary job ID before the underscore/dot:
$ scancel 8504
To cancel part of a batch job/array, instead specify the ID of the
sub-task after the ID of the batch job, using a dot (.) to separate
the two IDs instead of an underscore (_):
$ scancel 8504.1
Warning
While it is possible to use sbatch with jobs of any size, it
should be remembered that Slurm imposes some overhead on jobs. It is
therefore preferable to run fast commands in batches, instead of
submitting each command to slurm, individually. See the
Batching commands in bash page for more information.
Mapping task IDs to data
Using sbatch arrays requires that you map a number (the array task
ID) to a filename or similar. The above example assumed that filenames
were numbered, but that is not always the case.
The following describes a few ways in which you can map array task ID to filenames in a bash script.
Using numbered filenames:
The example showed how to handle filenames where the numbers were simply written as 1, 2, etc.:
1# Simple numbering: sample1.vcf, sample2.vcf, etc.
2FILENAME="sample${SLURM_ARRAY_TASK_ID}.vcf"
However, it is also possible to format numbers in a more complicated manner (e.g. 001, 002, etc.), using for example the printf command:
1# Formatted numbering: sample001.vcf, sample002.vcf, etc.
2FILENAME=$(printf "sample%03i.vcf" ${SLURM_ARRAY_TASK_ID})
See above for an example script and the expected output.
Using a table of filenames:
Given a text file
my_samples.txtcontaining one filename per line:/path/to/first_sample.vcf /path/to/second_sample.vcf /path/to/third_sample.vcf
1# Prints the Nth line
2FILENAME=$(sed "${SLURM_ARRAY_TASK_ID}q;d" my_samples.txt)
A sbatch script could look as follows:
1#!/bin/bash
2#SBATCH --array=1-3
3
4FILENAME=$(sed "${SLURM_ARRAY_TASK_ID}q;d" my_samples.txt)
5
6module load htslib/1.18
7bgzip "${FILENAME}"
Using a table of numbered samples (
my_samples.tsv):ID
Name
Path
1
first
/path/to/first_sample.vcf
2
second
/path/to/second_sample.vcf
3
third
/path/to/third_sample.vcf
1# Find row where 1. column matches SLURM_ARRAY_TASK_ID and print 3. column
2FILENAME=$(awk -v ID=${SLURM_ARRAY_TASK_ID} '$1 == ID {print $3; exit}' my_samples.tsv)
By default,
awkwill split columns by any whitespace, but if you have a tab separated file (.tsv) file it is worthwhile to specify this using theFS(field separator) option:1# Find row where column 1 matches SLURM_ARRAY_TASK_ID and print column 3 2FILENAME=$(awk -v FS="\t" -v ID=${SLURM_ARRAY_TASK_ID} '$1 == ID {print $3; exit}' my_samples.tsv)
This ensures that
awkreturns the correct cell even if other cells contain whitespace.A sbatch script could look as follows:
 1#!/bin/bash
 2#SBATCH --array=1-3
 3
 4# Grab second column where the first column equals SLURM_ARRAY_TASK_ID
 5NAME=$(awk -v FS="\t" -v ID=${SLURM_ARRAY_TASK_ID} '$1 == ID {print $2; exit}' my_samples.tsv)
 6# Grab third column where the first column equals SLURM_ARRAY_TASK_ID
 7FILENAME=$(awk -v FS="\t" -v ID=${SLURM_ARRAY_TASK_ID} '$1 == ID {print $3; exit}' my_samples.tsv)
 8
 9module load htslib/1.18
10echo "Now processing sample '${NAME}'"
11bgzip "${FILENAME}"
Additional resources
Slurm documentation
Slurm summary (PDF)